WRMK | Party Goodie Bags | Buenos Dias Obed Marshall | Video


[Ad] Welcome to my blog and a fun Party Goodie Bags inspiration with a video tutorial link further down. So, you've had a wonderful party and now it's time for your guests to hit the road back home. It's always a good idea to give them a little something to remember the great day or evening you spent together. From my own experience I can say that goodie bags are always a great idea! You can stuff them with sweets, candies, pencils, flair buttons, bracelets and other small items. You don't have an idea yet how to make party goodie bags? And you are looking for a fun DIY inspiration? Here we go:


How to make the goodie bags: I used the All-In-One-Tool by We R Memory Keepers to cut and score patterned papers from the Buenos Dias Collection by Obed Marshall. First, I started by cutting a piece of paper to size 9" by 6.5". Second, I scored the paper at 4.5" (that's half of 9"). Third, I adhered double-sided tape and folded the paper to make a pocket. The pocket will be size 4.5" by 6.5". Tip: Use a hole punch to add a notch at the top. You can also add a stitched edge with your sewing machine. Can you spot the stitching along the edges on the pocket below?


And now it's time to decorate your party goodie bag. I used die-cut shapes, a paper frame, a pre-made gift tag, and acrylic shapes from Buenos Dias. I just love the fancy colors and how this papercrafting line just radiates fun and happiness. It's perfect for all kinds of party-related papercrafts. Tip: Layer your embellishments with foam pads to add dimension!


And now please watch my video tutorial how to make the Party Goodie Bags:


Thank you for stopping by. I hope you enjoyed this blog post and also the video that I created. Have fun creating! Wishing you a lovely day, yours Sandra ♥.


American Crafts | Two tiny tips for your Traveler's Journal

American Crafts | Two tiny tips for your Traveler's Journal


[Ad] Hello to a new blog post featuring 'Two tiny tips for your Traveler's Journal' with papers and embellishments from Jen Hadfield's Reaching Out Collection / American Crafts. I created some fun projects over the past month with this scrapbook and papercrafting collection. Have a look at some fancy father's day cards and some lovely cards with bows and bouquets. But before we move on to my two tiny tips for your traveler's journal, here are some measures for you to create a traveler's journal.

Basic facts about my journal:
  • The base for the traveler's notebook is 9 x 9 inches.
  • I scored the paper at 4.5 inches to make the journal.
  • And I used the Bookbinding Tool from We R Memory Keepers to bind the journal.

And now on to the two tiny tips:

  1. Create little slip-in-pockets for photos in no time. Just cut three small paper strips and glue them onto one of the journal pages. Leave the top open so you can insert the photos.
  2. Press little flowers with the Wood Press from the American Crafts' Sustainable Journaling Line. These will be cute eye-catchers in your journal.


Traveler's Journal inspiration with slip-in-pockets


Cut the base of your journal. I used papers size 9 x 9 inches. And scored the pages at 4.5 inches. Scrapbooking and memorykeeping inspiration with Mojosanti


Create slip in pockets from paper strips and use double-sided tape to glue the strips into your journal


Press flowers with the wood press from the Sustainable Journal Collection by American Crafts scrapbooking memorykeeping


And that's it from me today. Just a short nice post with two tips to elevate your journal. I hope you like my inspiration. Wishing you a lovely day, yours Sandra ♥.


American Crafts | Two tiny tips for your Traveler's Journal


WRMK | Summer Vacation Mini Album | Buenos Dias by Obed Marshall

Create a fun ring binder mini album to record your summer holidays. Ring binder mini album with the scrapbook collection Buenos Dias by Obed Marshall for American Crafts


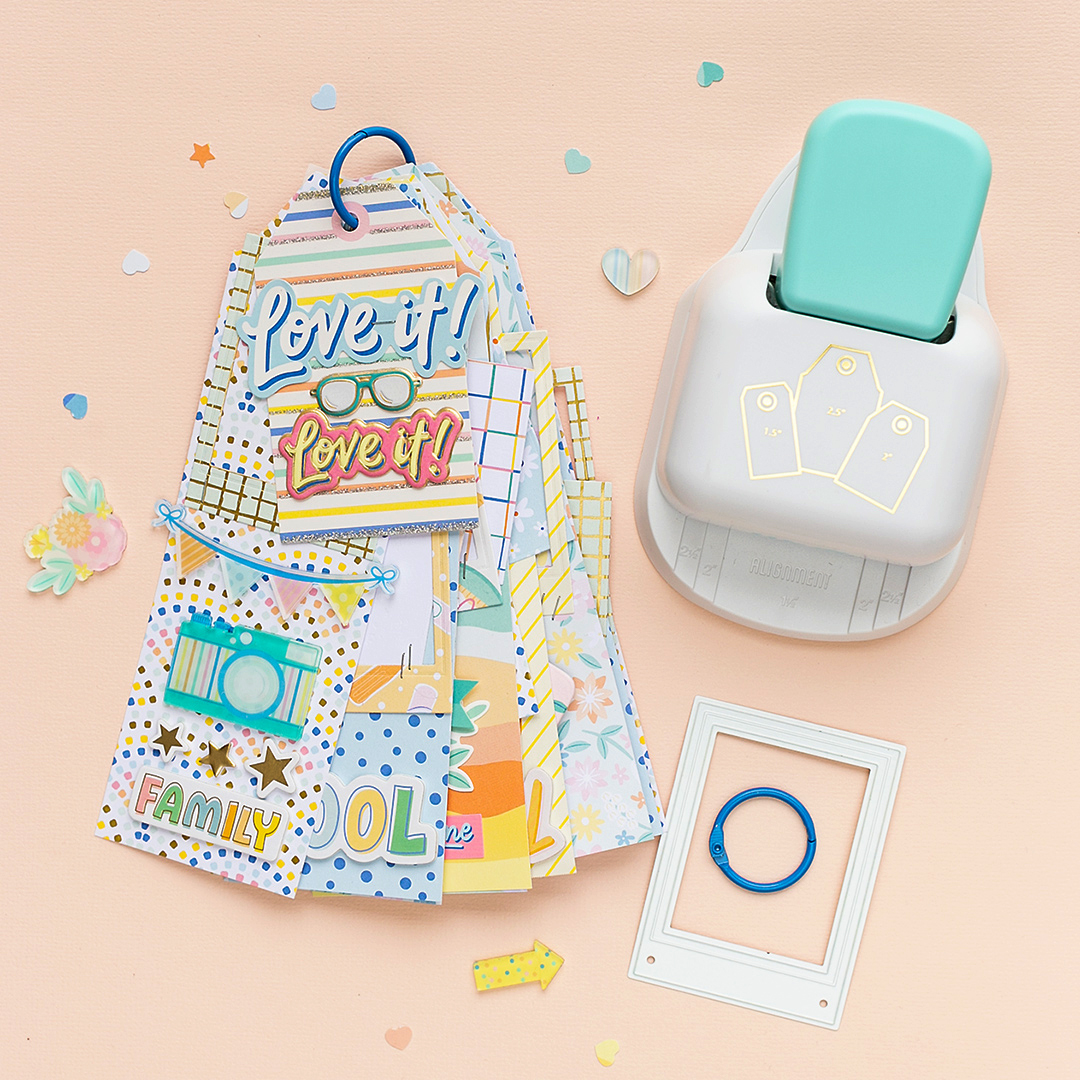
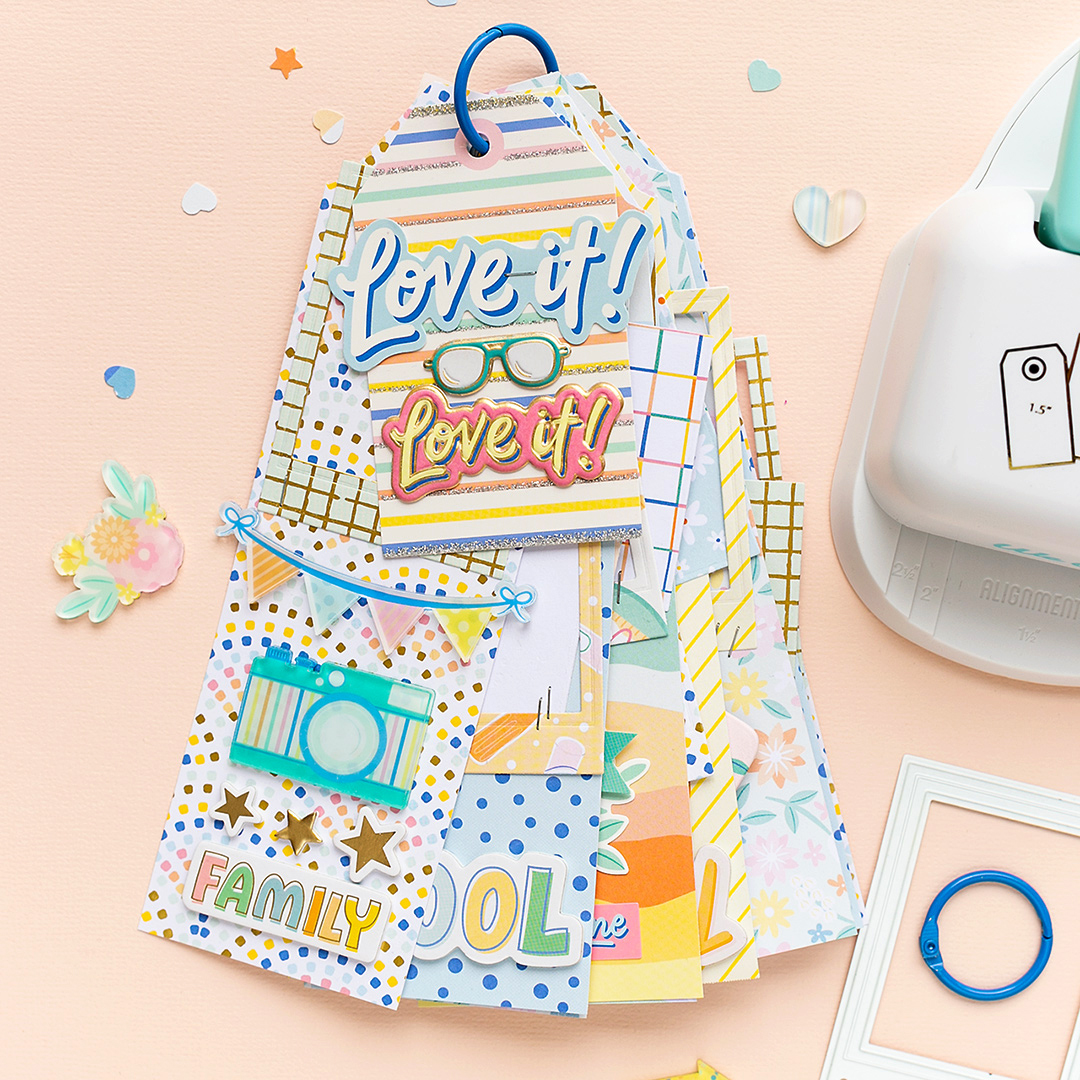
[Ad] Welcome to a Summer Vacation Mini Album inspiration ♥. To make the album, I used one of the new 3-in-1 tag punches by We R Memory Keepers + papers and embellishments from the papercrafting collection 'Buenos Dias' by Obed Marshall for American Crafts. Let's take a look at the album: I used one of the blue ring binders from Obed's scrapbook collection to make the album base. Next, I added some fun acrylic shapes, stickers, and die-cut shapes from 'Buenos Dias'.


Use the 3-in-1 punches by WRMK to make a ring mini album. Add papers and embellishments from Buenos Dias by Obed Marshall.


It's really easy to create a ring mini album with the tag punch. You can make tags in three different sizes: 1.5", 2" and 2.5". For my album, I grabbed papers from the 6 x 8 paper pad from 'Buenos Dias' and cut several pieces of papers (width 2.5"). Then I punched the tags with the tag punch. Really easy, isn't it? I also cut polaroid frames - 'Buenos Dias' comes with some cute dies - with my die-cutting machine. And then I added the frames onto the pages. I'm going to use this album to record our summer holiday. All I need to do next is to add the photos that I'll take during our vacation.


Die-cut polaroid frames and add them to your scrapbook and papercrafting projects. Stickers, and die-cuts from Buenos Dias by Obed Marshall


Album page with stickers, polaroid frames and die-cuts. Scrapbooking, papercrafting, memorykeeping


Cover page of the scrapbook mini album family time. Modern memorykeeping

I hope you like my Summer Vacation Mini Album inspiration. I LOVE that it's ready to go - I just need to add photos to finish the album. Isn't this great?! And now have fun creating a mini album yourself. Thanks for stopping by! Xoxo, Sandra ♥.

Check out my pinterest pin for summer mini album with craft supplies from American Crafts and WRMK